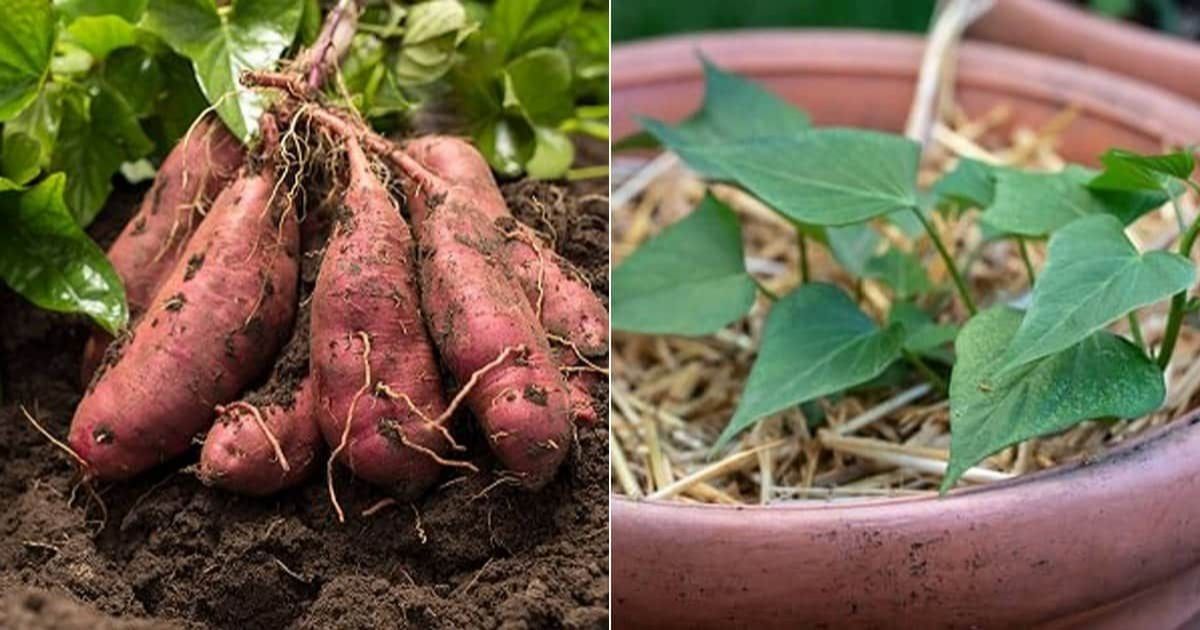
Sweet potatoes are a delicious and nutritious vegetable that has become increasingly popular in home gardens. These versatile tubers are not only easy to grow but also offer a bountiful harvest that can last for months when properly cured and stored. In this comprehensive guide, we’ll explore the best practices for harvesting and curing sweet potatoes, ensuring that you get the most out of your crop.
When are Sweet Potatoes Ready to Harvest?
Knowing when to harvest your sweet potatoes is crucial for achieving the best flavor and storage potential. Unlike some other vegetables, sweet potatoes don’t have obvious visual cues that indicate they’re ready for harvest. However, there are several factors you can consider to determine the optimal harvest time:
- Days to maturity: Most sweet potato varieties reach maturity between 90 to 120 days after planting. Keep track of your planting date and refer to the specific variety’s recommended harvest time.
- Leaf color: In some climates, the leaves may begin to yellow or turn slightly purple when the tubers are ready. However, this isn’t always a reliable indicator, especially in warmer regions where vines may remain green until frost.
- Soil temperature: Sweet potatoes generally stop growing when soil temperatures drop below 65°F (18°C). If you’re approaching this temperature, it’s time to consider harvesting.
- Sample digging: Carefully dig up a test plant to check the size of the tubers. If they’re the desired size, you can proceed with harvesting the rest of the crop.
- Frost warning: If there’s a risk of frost in your area, harvest your sweet potatoes immediately, as frost can damage the tubers and reduce their storage life.
Remember that harvesting too early may result in smaller tubers with less developed flavors while harvesting too late can lead to oversized, woody potatoes or frost damage. It’s often better to err on the side of harvesting a bit early rather than too late.
What to Do About the Sweet Potato Leaves?
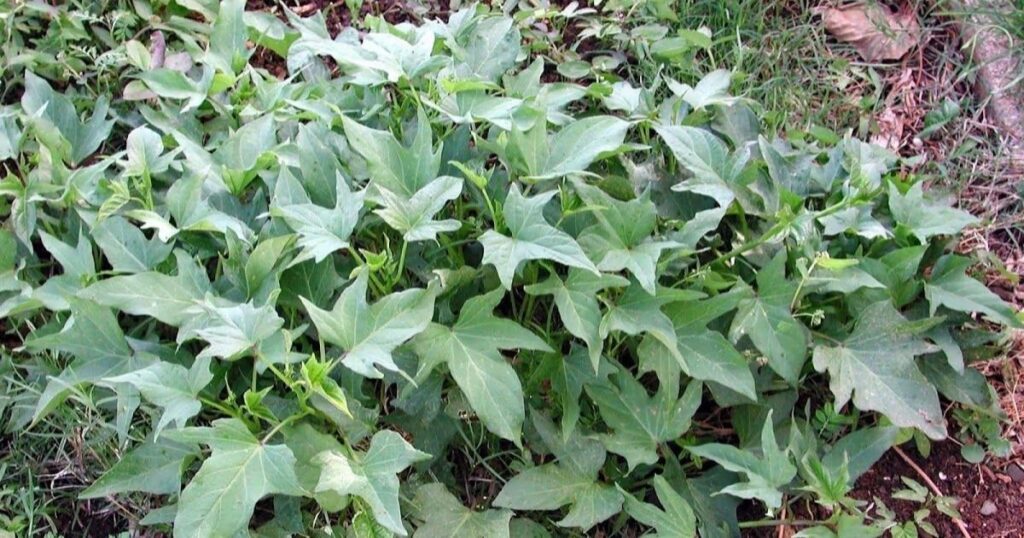
Sweet potato leaves are an often-overlooked resource in the garden. Before you begin harvesting, consider these options for utilizing the abundant foliage:
- Culinary use: Sweet potato leaves are edible and nutritious. They can be used similarly to spinach or other leafy greens in salads, stir-fries, or smoothies. The leaves have a mild, slightly sweet flavor and are rich in vitamins A and C.
- Composting: If you don’t plan to eat the leaves, they make an excellent addition to your compost pile. Sweet potato leaves are considered “green” material, providing nitrogen to balance the “brown” carbon-rich materials in your compost.
- Animal feed: If you have livestock or know someone who does, sweet potato leaves can be a nutritious feed for animals like rabbits, goats, or chickens.
- Mulch: Chop up the leaves and use them as mulch around other plants in your garden. This helps retain soil moisture and adds nutrients as the leaves decompose.
- Wildlife feeding: In some areas, leaving the leaves for a short period before harvest can attract beneficial wildlife like deer, which may help clear the area for easier harvesting.
By utilizing the leaves, you’re maximizing the yield from your sweet potato crop and reducing waste in your garden.
Also read this post:professional overgrown garden clearance services in London.
Conditions for Harvest
Creating the right conditions for harvesting your sweet potatoes can make the process easier and help protect the quality of your crop:
- Soil moisture: Ideally, harvest when the soil is slightly damp but not wet. Overly dry soil can make digging difficult and increase the risk of damaging the tubers, while wet soil can lead to muddy, hard-to-clean potatoes.
- Weather: Choose a dry, overcast day for harvesting if possible. This provides comfortable working conditions and reduces the risk of sunscald on freshly harvested tubers.
- Time of day: Early morning or late afternoon are often the best times to harvest, avoiding the heat of midday which can stress both you and the potatoes.
- Tools preparation: Ensure all your harvesting tools are clean and sharp before you begin. This makes the process more efficient and reduces the risk of damaging the tubers.
- Storage preparation: Have your curing and storage areas ready before you start harvesting. This allows you to move the sweet potatoes to their curing location quickly after harvest.
By considering these conditions, you’ll set yourself up for a successful and efficient sweet potato harvest.
Some General Advice Before Getting Started
Before you dive into harvesting your sweet potatoes, keep these important tips in mind:
- Plant variety matters: Different sweet potato varieties may have different growth habits and harvesting needs. Familiarize yourself with the specific characteristics of the varieties you’re growing.
- Root system understanding: Sweet potatoes grow from the plant’s roots, forming clusters. Unlike regular potatoes, they don’t grow on stolons, so you’ll need to dig carefully to find all the tubers.
- Vine growth patterns: Sweet potato vines can root at multiple points along their length, potentially forming additional small clusters of tubers away from the main crown.
- Gentle handling: Sweet potatoes have delicate skins when first harvested. Handle them gently to avoid bruising or scratching, which can lead to spoilage during storage.
- Time management: Harvesting sweet potatoes can be time-consuming. Plan to spread the task over a day or two if needed, especially for larger plantings.
- Cleaning considerations: Avoid washing freshly harvested sweet potatoes. Instead, let them dry and brush off excess soil gently. Washing can introduce moisture that promotes rot during curing and storage.
- Pest awareness: Be on the lookout for any signs of pest damage as you harvest. Identifying issues now can help you separate damaged tubers and prevent problems from spreading during storage.
By keeping these points in mind, you’ll be well-prepared to tackle your sweet potato harvest effectively and efficiently.
Tools
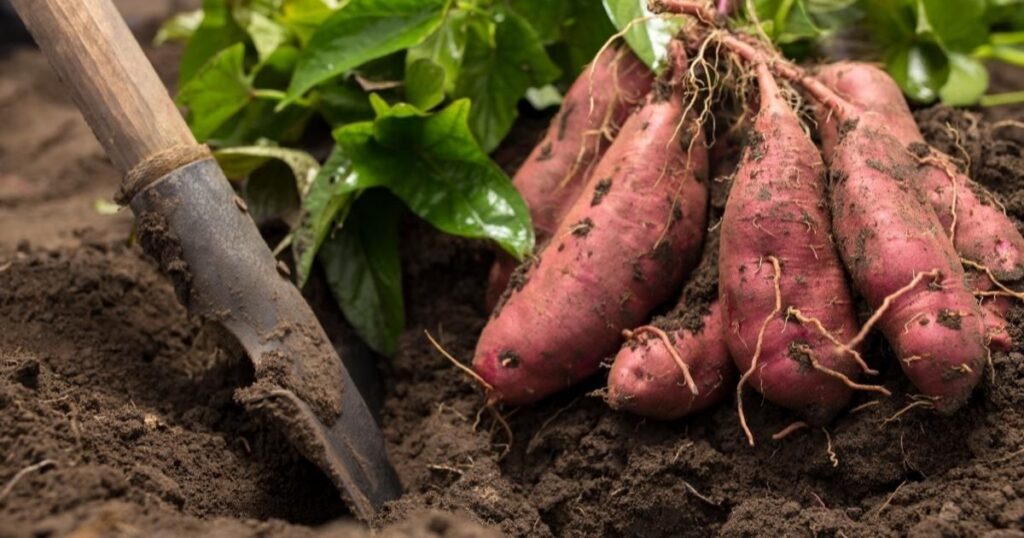
Having the right tools on hand can make the process of harvesting sweet potatoes much easier and reduce the risk of damaging the tubers. Here are some essential tools to consider:
- Garden fork: This is often the tool of choice for harvesting sweet potatoes. Its tines can loosen the soil around the tubers without piercing them as easily as a shovel might.
- Broad fork: For larger plantings, a broad fork can help loosen a wider area of soil at once, making the harvesting process more efficient.
- Shovel: While not as ideal as a fork, a sharp shovel can be useful, especially in heavier soils. Use it carefully to avoid cutting into the tubers.
- Hand trowel: This is useful for carefully digging around individual plants or in tight spaces.
- Pruning shears: These are handy for cutting vines and separating tubers from the main plant.
- Harvesting baskets or buckets: Choose containers that are sturdy but not too deep, to avoid piling too many potatoes on top of each other.
- Garden gloves: Protect your hands during the digging and handling process.
- Kneeling pad: This can make the harvesting process more comfortable, especially if you’re working in a large patch.
Remember, the key is to use tools that allow you to dig gently and precisely, minimizing damage to the sweet potatoes as you unearth them.
Find the Crown (the Central Plant)
Locating the crown of each sweet potato plant is crucial for efficient harvesting. The crown is the central point from which the vines spread out, and it’s typically where you’ll find the largest cluster of tubers. Here’s how to find and work with the crown:
- Visual identification: Look for the thickest part of the vine that enters the soil. This is usually the crown.
- Marking method: If you followed best planting practices, you may have marked the location of each plant with a stake at planting time. This makes finding the crown much easier at harvest.
- Vine tracing: If the crown isn’t immediately obvious, carefully follow the vines back to their origin point in the soil.
- Gentle probing: Once you think you’ve located the crown, gently feel around the soil surface for a slight mound or raised area, which often indicates the location of the main tuber cluster.
- Careful digging: Start digging about 12-18 inches away from the crown, working your way in carefully to avoid damaging the tubers.
- Multiple crowns: In some cases, particularly with varieties that produce abundant vines, you may find multiple points where the vine has rooted and formed additional crowns. Treat each of these as a potential tuber location.
Remember, the crown is your starting point for harvesting, but it’s not the only place you’ll find sweet potatoes. Be prepared to explore the full extent of the plant’s root system as you harvest.
Inspect the Vines
Before you start digging, a thorough inspection of the sweet potato vines can provide valuable information and potentially increase your harvest. Here’s what to look for:
- Secondary rooting points: Sweet potato vines can root at multiple points along their length. Look for areas where the vine touches the ground and has developed roots.
- Soil mounds: Small mounds in the soil along the vine’s length may indicate where additional tubers have formed.
- Vine health: The condition of the vines can give clues about the health of the tubers below. Healthy, green vines usually indicate healthy tubers, while diseased or damaged vines might suggest problems underground.
- Vine extent: Map out how far the vines have spread. This gives you an idea of the total area you’ll need to check for tubers.
- Pest damage: Look for any signs of pest activity on the vines, such as chew marks or discoloration, which might indicate potential issues with the tubers.
- Variety characteristics: Different sweet potato varieties may have different vine growth patterns. Familiarize yourself with the typical growth habits of your variety.
- Lifting test: Gently lift sections of vine off the ground. If they resist or you feel tubers beneath, mark these spots for careful digging.
By thoroughly inspecting the vines before you start digging, you can develop a more effective harvesting strategy and potentially uncover sweet potatoes you might otherwise have missed.
Get Digging!
Now that you’ve prepared and inspected your sweet potato patch, it’s time to start the actual harvesting process. Here’s a step-by-step guide to digging up your sweet potatoes:
- Start wide: Begin digging about 12-18 inches away from the plant’s crown. This reduces the risk of accidentally damaging the tubers.
- Use your tool of choice: Whether you’re using a garden fork, shovel, or broad fork, insert it into the soil at a 45-degree angle and gently leverage it to loosen the soil.
- Work in a circle: Gradually work your way around the plant, loosening the soil as you go.
- Look for tubers: As you loosen the soil, keep an eye out for the characteristic shape and color of sweet potatoes.
- Hand digging: Once you spot tubers, switch to hand digging or use a hand trowel to carefully remove soil and expose the full cluster.
- Lift gently: When the cluster is exposed, gently lift it from the soil. Avoid pulling on the vines, as this can separate the tubers from the main cluster.
- Check for stragglers: After removing the main cluster, carefully check the surrounding area for any tubers that may have separated.
- Move along the vines: Remember to check along the length of the vines for additional rooting points and potential tuber clusters.
- Shake off excess soil: Gently shake the harvested tubers to remove loose soil, but avoid washing them at this stage.
- Sort as you go: As you harvest, sort your sweet potatoes into groups based on size and any visible damage. This will make the curing and storage process easier later on.
Remember, patience is key when harvesting sweet potatoes. Take your time to avoid damaging the tubers, and enjoy the process of uncovering your homegrown bounty!
How to Cure Sweet Potatoes
Curing is a crucial step in preparing your sweet potatoes for long-term storage. This process helps heal minor cuts or bruises, thickens the skin, and enhances the flavor by converting starches to sugars. Here’s how to properly cure your sweet potatoes:
- Timing: Begin the curing process immediately after harvest.
- Temperature: Maintain a temperature between 80-85°F (27-29°C) for optimal curing.
- Humidity: Keep the relative humidity high, around 80-90%.
- Duration: Cure for 4-14 days, depending on your specific conditions.
- Ventilation: Ensure good air circulation around the tubers.
- Spacing: Arrange sweet potatoes in a single layer, not touching each other.
Location options:
- Greenhouse
- Warm, humid room
- Makeshift curing chamber using a cardboard box and a small heater
Monitoring: Check your sweet potatoes regularly during the curing process for any signs of rot or pest issues.
Completion: You’ll know curing is complete when any cuts have healed and the skin feels firmer.
Proper curing not only improves the flavor and texture of your sweet potatoes but also significantly extends their storage life, allowing you to enjoy your harvest for months to come.
How to Store Sweet Potatoes
After curing, proper storage is key to maintaining the quality of your sweet potatoes for as long as possible. Follow these guidelines for optimal storage:
- Temperature: Store at 55-60°F (13-16°C). Cooler temperatures can alter the flavor and texture.
- Humidity: Aim for a relative humidity of 75-80%.
- Darkness: Store in a dark place to prevent sprouting.
- Ventilation: Ensure good air circulation to prevent moisture buildup.
- Containers: Use breathable containers like baskets, boxes with ventilation holes, or even paper bags.
- Spacing: Avoid stacking too many potatoes on top of each other to prevent bruising.
- Inspection: Regularly check your stored sweet potatoes and remove any that show signs of spoilage.
- Rotation: Use the “first in, first out” method, using older potatoes before newer ones.
- Separation: Keep sweet potatoes away from other fruits and vegetables, especially apples, which release ethylene gas that can cause premature sprouting.
Location ideas:
- Cool basement
- Unheated spare room
- Root cellar
With proper storage, your harvested sweet potatoes can last 3-6 months or even longer, providing you with a steady supply of this nutritious vegetable throughout the winter months.
By following these guidelines for harvesting, curing, and storing your sweet potatoes, you’ll be able to enjoy the fruits of your labor for an extended period. Whether you’re baking them, frying them, or incorporating them into savory dishes, your homegrown sweet potatoes are sure to add delicious flavor and nutrition to your meals.
FAQs
How do you cure sweet potatoes after harvesting?
To cure sweet potatoes after harvesting, place them in a warm, humid environment with temperatures between 80-85°F (27-29°C) and relative humidity of 80-90% for 4-14 days. This process helps heal minor cuts, thickens the skin, and enhances flavor by converting starches to sugars.
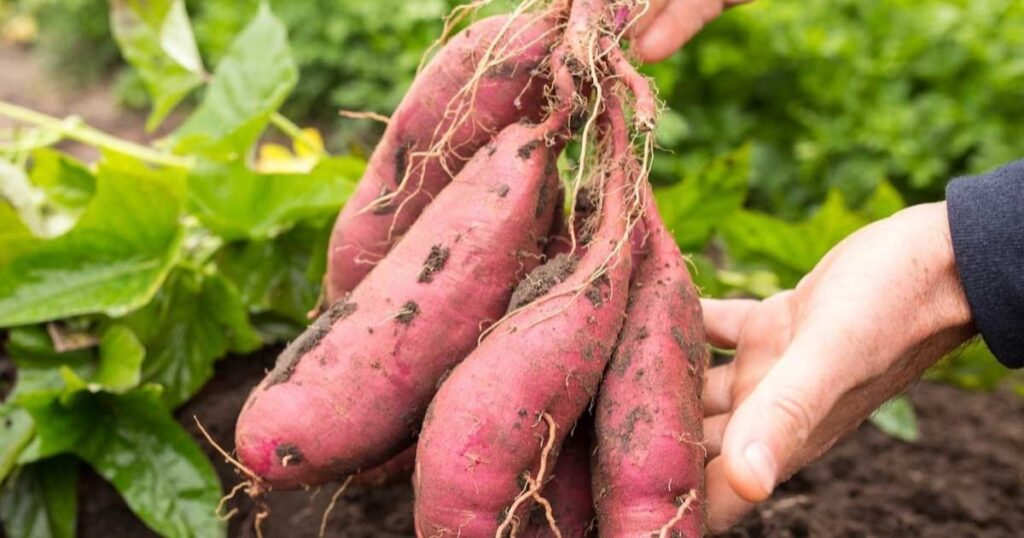
What is the best way to harvest sweet potatoes?
The best way to harvest sweet potatoes is to carefully dig around the plant with a garden fork or shovel, starting about 12-18 inches from the main stem and working your way in. Gently lift the entire cluster of tubers from the soil, careful not to bruise or damage them.
How do you cure potatoes after harvesting?
Curing potatoes after harvesting involves keeping them in a dark, well-ventilated area with high humidity (90-95%) and temperatures between 50-60°F (10-15°C) for 10-14 days. This process helps heal minor wounds and thickens the skin, preparing the potatoes for long-term storage.
Do sweet potatoes have to be cured before eating?
While sweet potatoes don’t have to be cured before eating, curing significantly improves their flavor and texture. Curing converts starches to sugars, making sweet potatoes sweeter and more flavorful, so it’s generally recommended to cure them before consumption for the best eating experience.
Learn how to harvest and cure sweet potatoes for optimal flavor and storage. Expert tips on timing, tools, and techniques for success.